 Chef Matt Cooks
How to Hold a Chef Knife With a Pinch Grip
- What is a pinch grip?
- Set up the station before holding the knife
- Build the grip one contact point at a time
- Run a control check before making a cut
- Pair the knife hand with a guide hand
- Practise on a stable ingredient
- Adjust pressure without losing control
- Know when the grip is not the problem
- When should you use a handle grip instead?
- What should you do if the knife slips?
- A reliable pinch-grip checklist
- Sources
What is a pinch grip?
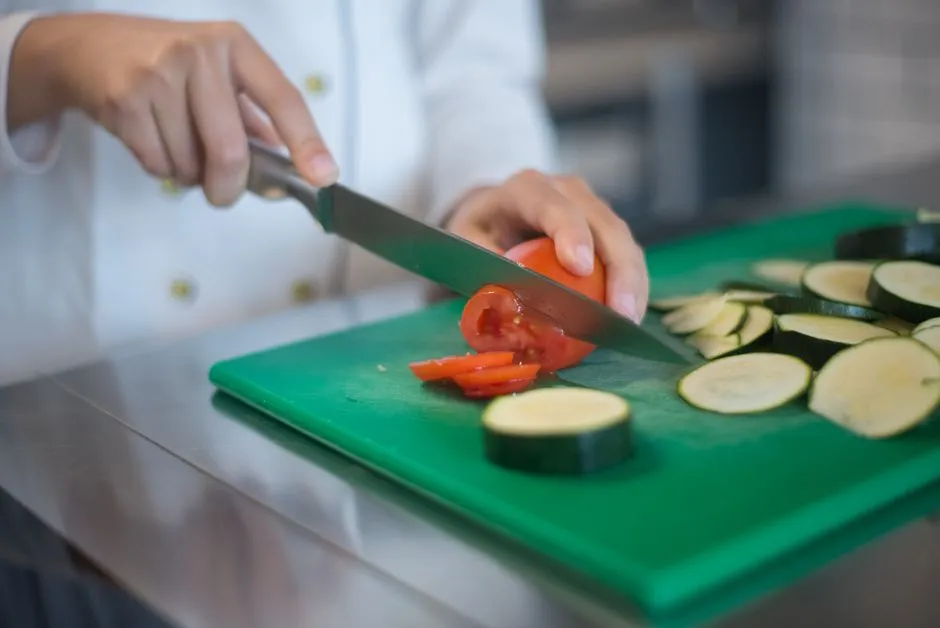
A pinch grip holds a chef’s knife near the point where blade and handle meet. The thumb rests on one face of the blade and the side of the index finger rests on the other; the remaining fingers wrap around the handle. The fingers stay behind the cutting edge.
That shortens the working lever between your hand and the blade. More importantly, it gives you direct feedback when the blade starts to turn. NC State Extension teaches the pinch grip for precision, while Nebraska Extension describes the thumb and first finger gripping the blade just beyond the handle for control.
It is a control method, not a speed trick. A secure grip should let you guide the knife without squeezing hard, bending the wrist sharply or moving a finger toward the edge.
Set up the station before holding the knife
Do not try to solve a moving board or rolling ingredient with a stronger grip. Fix the station first.
- Put the cutting board on a level, uncluttered counter. If it slides, use its nonslip feet, a clean damp towel or a nonslip mat beneath it. NC State Extension calls for a sturdy nonslip board, and Illinois Extension recommends a damp towel beneath a board that moves.
- Keep the knife, handle and working hand clean and dry. Move bowls, cords and other tools outside the blade’s path.
- Choose a chef’s knife that fits your hand and the food. A damaged handle, loose blade or badly chipped edge needs repair or replacement before use.
- Give round food a stable flat face before repeated cutting. Nebraska Extension advises halving fruits and vegetables before further slicing so they sit firmly.
- Keep children and pets outside the work area. Do not leave the knife under a towel, in a sink or near the counter edge.
If the food is raw meat, poultry, seafood or eggs, keep it and its board away from ready-to-eat food. The FDA says to wash hands, knives, boards and counters with hot soapy water after working with each food item and to use a separate board or plate for raw foods.
Build the grip one contact point at a time
Start with the knife lying flat on the secured board, edge facing away from you. Use your dominant hand; the directions mirror for a left-handed cook.
- Find the heel and handle junction. The heel is the rear portion of the cutting edge. Your grip belongs above and behind it, never on the sharpened edge.
- Place the thumb on the blade face. Set the pad of the thumb against one side near the handle. Keep it flat enough that its tip does not curl under the blade.
- Place the index finger opposite the thumb. Use the side of the bent finger on the other blade face. Do not point the finger along the spine; Illinois Extension specifically advises against that position.
- Wrap the last three fingers around the handle. The middle finger sits just behind the heel, followed by the ring and little fingers. None should hang below the handle where the edge can reach them.
- Close the hand only enough to steady the knife. The thumb and index finger guide; the other fingers support. Keep the wrist close to neutral rather than cocked sharply inward or outward.
The contact can look slightly different around a thick bolster or a handle that begins close to the heel. The non-negotiable boundary is that skin stays behind the edge and the knife remains steady. If the shape forces a finger toward the edge, stop and use a different knife or a secure handle grip.
Run a control check before making a cut
Leave the blade on the board and check the grip without food.
First, look down at all five fingers. The thumb and index finger should contact the blade near the handle; the other fingers should be fully around the handle. No fingertip should sit below the handle or alongside the edge.
Next, make a slow, shallow forward-and-down motion with the edge still contacting the board. The hand and blade should travel as one unit. If the handle shifts inside the palm, the blade yaws sideways or the wrist collapses, reset. Do not correct a loose grip while the knife is moving.
Finally, release the knife onto the board with the edge turned away from the hand that will next pick it up. NC State Extension recommends that resting position. If the knife falls, step back and let it land; never try to catch it.
Pair the knife hand with a guide hand
The pinch grip controls only one side of the job. The other hand controls the food.
Curl the guide-hand fingertips under, keeping the thumb and little finger behind the front fingers. Nebraska Extension describes the side of the blade—not the edge—meeting the middle knuckles as the guide hand moves back after each cut. Keep the knuckles upright and the fingertips out of the cutting line.
The guide hand must not chase loose pieces. Stop, place the knife flat, regroup the food, then resume. If an ingredient rocks, rolls or is too small to hold with the fingertips protected, change the preparation method rather than improvising.
Our basic knife-cuts guide explains how guide-hand position works with common cut shapes. Learn the two hands together at a deliberate pace. Uniformity comes from repeatable positioning, not from moving quickly.
Practise on a stable ingredient
Choose a firm ingredient with a broad flat face and enough length to hold comfortably. Set it flat-side down. Avoid hard squash, bones, frozen food and tiny ends while learning; they demand more force or leave too little room for the guide hand.
Use this sequence:
- Set the pinch grip and inspect every finger.
- Form the guide-hand claw and hold the food steady.
- Make one slow cut with a smooth motion suited to the knife and ingredient.
- Place the blade flat and inspect the slice, hand position and food stability.
- Reset before the next cut.
Chef’s knives have different profiles. Some suit a rocking motion with the tip near the board; others move more naturally down and forward. Nebraska Extension describes a rocking action, while the Institute of Culinary Education demonstrates grip, body position and follow-through as connected skills. Neither source makes speed the goal. Do not force a blade through food or use a rapid vertical chop simply to imitate someone else’s rhythm.
Adjust pressure without losing control
A white-knuckle grip is not a better pinch grip. Too much pressure tires the hand and can make small corrections harder. Too little pressure lets the handle turn.
Use the lightest pressure that keeps the knife aligned during a slow cut. Pause after a few repetitions and open the hand. If the thumb and index finger show a mild contact mark, move them slightly farther from a sharp spine corner or use a knife with a more comfortable blade and bolster shape. If you feel pain, tingling, numbness, cramping or loss of control, stop using the knife. A different handle, an adaptive cutting tool or hands-on guidance may be more appropriate.
Do not wrap a loose cloth, tape or makeshift padding around the handle. It can shift, hold moisture or hide damage. Any grip aid should be designed for the knife and fitted according to its manufacturer’s instructions.
Know when the grip is not the problem
Stop and reset when any of these appears:
- The board moves. Stabilise it before touching the food again.
- The ingredient moves. Create a flat base or choose a safer tool and method.
- The knife wedges or needs heavy force. The knife may be dull, damaged or wrong for the task. Do not add body weight to the cut.
- The blade twists. Set it down, dry the hand and handle, and rebuild the grip.
- A finger creeps forward. Stop immediately and move the contact point behind the edge.
- Your view is blocked. Clear the board, improve the lighting or reduce the batch.
Nebraska Extension notes that dull knives can encourage excess force and loss of control. Follow the knife maker’s care instructions or use a qualified sharpening service if you cannot restore the edge safely. A pinch grip cannot compensate for a defective tool.
When should you use a handle grip instead?
The pinch grip is commonly taught for a broad chef’s knife, but it is not mandatory for every hand, knife or task. A small paring knife may not provide a safe blade area to pinch. Some chef’s knives have bolsters or blade shapes that make the contact uncomfortable. A person with limited grip strength, joint pain, tremor or reduced sensation may need a different knife or adaptive setup.
A secure handle grip is acceptable when it keeps every finger behind the edge and the blade steady. The test is controlled alignment, not whether the hand matches a photograph. Do not switch grips while cutting. Place the knife down, change the hand position, then begin again.
For a valuable knife with an unusual geometry, follow the manufacturer’s handling guidance. For persistent discomfort or difficulty controlling a blade, get in-person instruction or advice on an appropriate adaptive tool rather than practising through the problem.
What should you do if the knife slips?
If the knife slips but no one is cut, stop. Put it flat on the board, move the food and hands away, then identify whether moisture, board movement, food shape, a dull edge or the grip caused the loss of control. Do not continue until the cause is corrected.
If a cut occurs, set the knife down and move away from food. The NHS advises applying pressure with a clean bandage or folded cloth when nothing is embedded. Follow local emergency guidance immediately if bleeding will not stop, blood is spurting, the wound is very large or deep, sensation or movement is lost, or an object is stuck in the wound. Do not remove an embedded object yourself.
A reliable pinch-grip checklist
Before each cutting session, confirm:
- the board is stable and the work area clear;
- the knife and hand are clean and dry;
- the thumb and bent index finger contact opposite blade faces near the handle;
- the remaining fingers wrap fully around the handle behind the heel;
- the wrist is comfortable and the blade stays aligned;
- the guide-hand fingertips and thumb remain behind the knuckles;
- the ingredient has a stable base;
- you can make one slow cut without excess force.
If one check fails, place the knife down and fix it. That pause is part of good knife technique.
Sources
- NC State Extension — How to Cut With a Chef’s Knife
- Nebraska Extension — How to Use a Chef’s Knife
- Institute of Culinary Education — Basic Knife Skills
- Illinois Extension — How to Safely Use Cutting Tools
- FDA — Food Safety at Home
- NHS — Cuts and grazes
Frequently asked questions
Where should my fingers go in a chef-knife pinch grip?
Put the thumb on one blade face and the side of the bent index finger on the other, close to the handle and behind the cutting edge. Wrap the middle, ring and little fingers around the handle. The exact contact point can shift around the bolster, but no fingertip should hang below the handle or move toward the edge.
Should a pinch grip feel tight?
It should feel secure, not clenched. Use enough pressure to stop the handle twisting while the wrist remains comfortable. Set the knife down and reset if it moves in your palm. Stop if you feel pain, tingling, numbness or cramping; a different knife, handle grip or adaptive tool may fit better.
Is a pinch grip safer than holding only the handle?
A pinch grip is widely taught because it gives direct control near the blade, but safety still depends on a stable board and food, a protected guide hand, a suitable sharp knife and deliberate movement. A secure handle grip can be appropriate when the knife shape or the cook’s hand makes a blade pinch uncomfortable.